I never even considered the idea of looking for a lost item at the closest “Lost and Found” booth and only went in that office looking for a computer with internet. So, if you lose your phone, don’t overlook it. Lost and Found is what people did before there was iCloud and Prey and it still works.
To prepare for the day you lose your iPhone, setup iCloud on it. It’s free, but requires at least iOS Version 5. Verify this on your phone by going to: Settings, General, About, “Version.”

If you meet the minimum requirement above, then you should see an “iCloud” menu item in the 3rd group of items under “Settings”

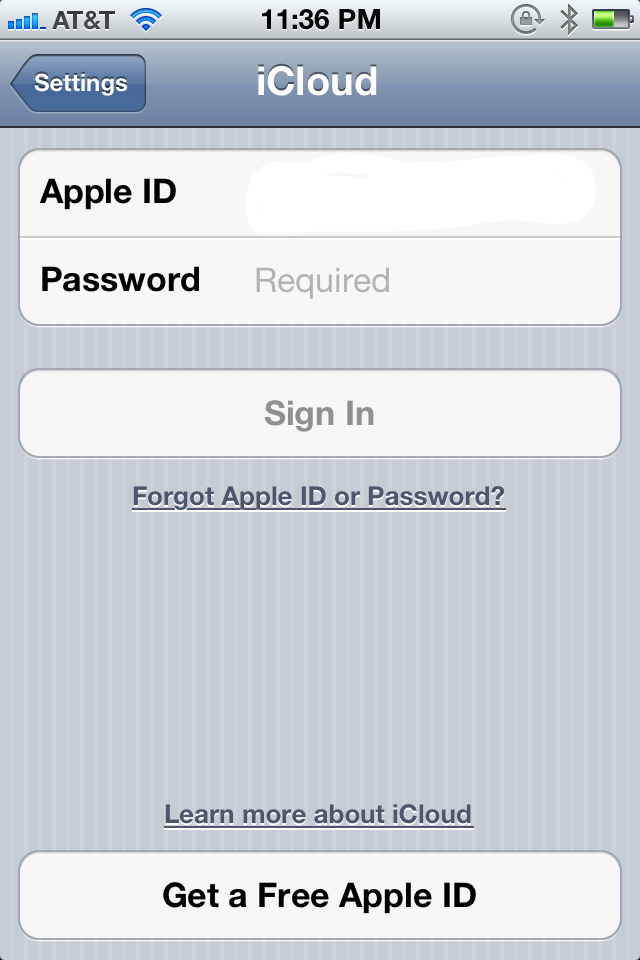
Tap on “iCloud” and if you haven’t set this up before, you’ll see the screen to enter your Apple ID credentials that associate your phone to an iCloud account.

If you don’t know your iCloud username (an email address) and password, try the username and password that you use to buy stuff from the iTunes store. Your “i-life” will be a little easier if you use the same Apple ID for iCloud as what you use for iTunes, though they are allowed to be different. Mine are the same.
What you definitely do NOT want to ever do is buy content from iTunes using different iTunes accounts or you will have a nightmare trying to to play/use the content that you bought. Aside from the following situation, I’m not sure what other advantages and disadvantages there are of using different iCloud and iTunes accounts on the same device.
One case in which I do setup a device with an iCloud account different from the iTunes account is when I setup an iPad, iPhone or iPod Touch for a child. In that case, I setup iCloud on the device (following the instructions given below) using the parent’s Apple ID, and create a separate iTunes account for the child to use in iTunes. To do this, you have to lie to Apple about the iTunes account owner’s birthday when creating that account to make sure it comes out to at least 18 years old. With the separate iCloud account that belongs to the parent, the parent has an overview in her own iCloud account of all devices (computers, ipods, phones) belonging to herself and all the children and can track them all without the kids messing them up, disabling the settings, or losing the passwords. Then each kid has her own Apple ID for iTunes, knows her own iTunes password, and so can independently buy content from the iTunes store on an “allowance,” gift cards, or credit card if you left one in the account (required to create an iTunes account). I would delete the credit card from the iTunes account after the account is created. To do that, from iTunes on the computer, go to “iTunes Store” in the left left panel, then “Account,” make sure you are logged in as the child, using the child’s iTunes account info, which is an email address (you had to lie to gmail.com about their age, too in order to get this email address) and iTunes password (which you should not have made the same as the password used to access the email itself). Then you’re at a screen that lists the iTunes account info and there will be an “Edit” link next to the credit card number. Click that and you’ll get to the screen to change the credit card. At the top of that are little picture icons of credit card and payment logos, and at the end of that is a rectangle that says “None.” Click “None” and your credit card data will go away, then click the “Done” button at the bottom of the screen to save the deleting of the credit card. When you return to the “Account” screen, the credit card should be gone and your child won’t be able to incur a giant bill.
So, get an Apple ID to make an iCloud account if you don’t already have one, or if you want to make a new one that is different from the iTunes account that will be used on this phone. If you need to create a new Apple ID account, do it on a computer to save yourself the hassle of typing on a phone. They will ask you for a username/Apple ID in the form of an email address and a password. It is best if you do not make the Apple ID password the same as the password you use to access that email, even though you will be tempted to re-use that password. Do yourself a favor and use a different password here, write it down and save it and the answers to the Apple ID security questions someplace safe.
Now that you have an Apple ID, which comes with an iCloud account, enter those credentials into the iPhone under Settings, iCloud, then “Sign In.” Click “Merge” if it asks you about that. Click “OK” if it asks you to allow location services.
Now under the iCloud settings, you should see a whole lot of things turned on. The most important is “Find My iPhone.” I personally turn off “Photo Stream,” “Documents and Data” and “Storage and Backup” but that is up to you.

Once that is setup, you can find this device on a map anytime by going to https://www.icloud.com in any web browser, and logging in with your Apple ID and password that you used in the iCloud settings.
If you lost your iPhone in your house, you can click an iCloud button to “Play Sound” and your phone will start squeaking so you can find it in the laundry room. If you lost it in a public place and don't want someone who picks it up to start reading your email or making phone calls, click the iCloud button to “Lock” and it will prompt you twice for a lock code and offer you the ability to display a message on the lock screen of the phone.

To turn off the lock, on the phone go to Settings, General, Passcode Lock, type in the passcode, then tap “Turn off Passcode,” and type the passcode again.
Last, if there is something on the phone that you cannot risk getting uncovered (by brute forcing unlock codes or using other special cracking software), you can click the “Remote Wipe” button and totally erase the phone right now before the phone is turned off, SIM card removed, or it’s otherwise taken off network where you can’t see/control it anymore.
Before the next step, let’s also go grab the free “Find My iPhone” app from the App Store so that you can easily check on the enabled-ness of tracking on your own phone and so that you can easily help a friend in the field who has lost an i-device or Macbook. Open “App Store” from one of your Home Screens and click “Search” and type “find my iphone.” Tap the "Find My iPhone" result made by Apple that looks like this:

“Find My Friends” is also a good app made by Apple that shows you where your and your friends’ phones are on a map when you share locations with each other. If someone who lost her phone didn’t install iCloud but did install “Find my Friends” and shared location with someone, that someone could help her find the lost iPhone on a map. When you login with Find My Friends, login with your iTunes account username/password (in many cases that might be the same as your iCloud username/password). If you think Find My Friends would ever be useful to you, tap to install it now in addition to Find My iPhone, before we get to the next step.
If you are running an older iOS version that doesn't support iCloud, or you want a backup method of tracking your phone, or want an app with more features concentrating on tracking and tracing stolen and lost devices, including taking pictures of the person using your phone, install Prey on your phone now. After it’s installed, you can get an overview of all your devices being monitored with Prey (it does laptops and desktop computers, too), set them as missing to start getting reports, and other actions through a web based control panel. You can read all about Prey at https://preyproject.com/.
Now that all the apps you need to track your phone are installed, you should configure your phone so that someone who finds your phone and is not nice can’t easily disable or uninstall them. Do this by enabling “Restrictions” on your phone.
Go to: Settings, General, Restrictions and tap “Enable Restrictions.” It will prompt you for a 4 digit code to use to alter these settings. Pick one and don’t forget it. Enter it again for confirmation. Now verify the following settings in here should be set this way:
Deleting Apps: off
Location (tap on this and on the next page, set : "Dont allow changes” after turning on all the following),
Location Services: On
Find Friends: On
Google: On
Maps: On
Prey: On
Reminders: On
Safari: On
Urbanspoon (or other local recommending app): On
Find My iPhone: On -> Find my iPhone: “On”, Status Bar Icon “Off”
Accounts (tap on this and on the next page, set : "Dont allow changes”)
When you finish, the Restrictions settings main page looks like this:

Doing that prevents someone from just deleting your iCloud account from Settings or uninstalling Find My Friends or Prey, which would cut you off from finding your phone. When you want to delete apps from your phone, you can either do it from iTunes on your computer and then sync, or on the phone itself, enter the code to temporarily disable the restriction.
Now if your phone is lost or stolen, you can do any of the following to find it:
a) Borrow someone’s iPhone/iPod Touch/iPad to run “Find my iPhone” (install it if they don’t have it). Login with your iCloud Apple ID and password.
b) Borrow a computer, smartphone or anything with a web browser and login to https://icloud.com with your iCloud Apple ID and password.
If you installed Prey, go to http://panel.preyproject.com and mark your phone as missing. Within minutes, you should start getting reports about where it is, possibly with photos of any person handling the device. Consider upgrading your free Prey account to a paid one to get a few more features that may help you recover your device faster.
If you borrowed a device for internet access (a public computer or asked a bystander to use their phone in order to track yours), make sure you logout of your iCloud or Prey account before handing it back to them.
If your phone doesn’t have a passcode lock on it and it is setup to be able to get into accounts you care about (like email) without having to type a password, I would use iCloud to lock it and set a message like “Reward, $50 for returning my phone, please bring to XYZ or call ABC.” Really, $50 is a cheap compared to how much hassle and expense it would be to replace a phone. Pay it gladly if you get the chance.
If you’re a Gmail or Google Apps user and use Google Two-Step Authentication with this phone as the authenticating device, you’ll want to break that connection and remove it as an account recovery contact point from Gmail and any other important online service like your bank. If this phone accesses any Google services using “application specific passwords” then you may want to revoke those also.
If you've been using the Gmail webmail in the iPhone's mobile Safari browser, you should login to Gmail with a browser and click the "Details" link at the bottom of the page and then the button to "Sign out of all other sessions."
If you use Google Voice, Vonage, or another service that is redirecting calls to your lost cellphone, go back to that provider and change settings to redirect those calls to another number that you can answer.
Happy phone hunting.


